Chives cultivation: best practices for growing Allium schoenoprasum
Today I’m excited to share everything you need to know about growing chives, one of the most rewarding herbs you can cultivate in your garden. This delightful perennial plant from the Allium family brings both flavor and beauty to any growing space, whether you’re working with a sprawling garden or a simple pot on your windowsill.
Chives are incredibly forgiving plants that reward even beginner gardeners with abundant harvests. Their slender, tubular leaves offer a mild onion flavor that enhances countless dishes, while their pretty purple flowers add charm to your garden beds throughout the growing season.
Understanding chives characteristics and growing requirements
The botanical name Allium schoenoprasum reveals this plant’s membership in the onion family, where it stands out for its exceptional hardiness and adaptability. Unlike some of its more demanding relatives, chives thrive in USDA zones 3-9, tolerating both cold winters and warm summers with remarkable resilience.
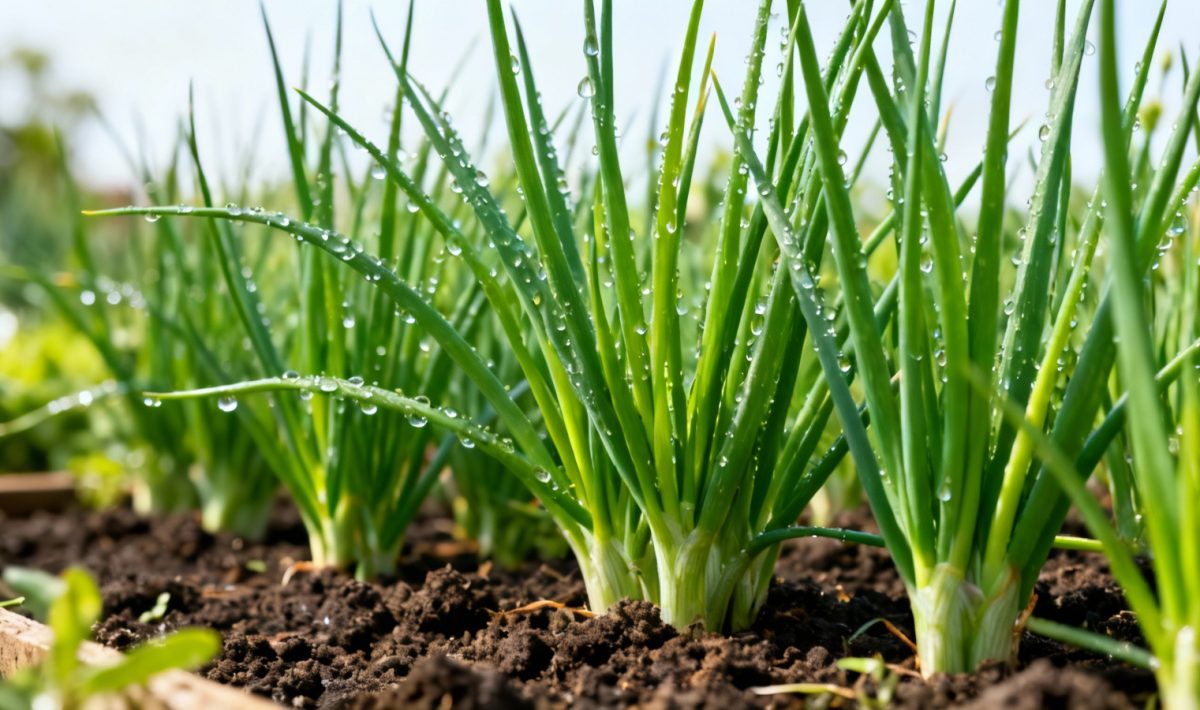
These perennial plants typically reach heights of 20-40 cm, forming attractive clumps that expand naturally over time. The feuillage consists of narrow, hollow leaves that emerge directly from underground bulbs, creating dense touffes that become more impressive each year. When planning your garden space, allow 20-30 cm between individual plants to accommodate their spreading habit.
The floraison period brings delicate purple globe-shaped flowers that not only look beautiful but also attract beneficial pollinators to your garden. Much like the care and propagation of common coleus, timing your planting and understanding growth cycles makes all the difference in achieving success.
Soil and lighting needs for optimal growth
Creating the right growing environment starts with understanding your soil conditions. Chives prefer well-draining terre with a pH between 6.0-7.0, though they’re surprisingly adaptable to various soil types. Whether you’re working with clay, sandy loam, or even rocky substrat, these plants will usually find a way to thrive.
The key factor for soil preparation is ensuring proper drainage, as waterlogged conditions can quickly lead to root rot. If your garden has heavy clay soil, consider adding compost or coarse sand to improve drainage. For pot culture, use a quality potting mix combined with perlite for optimal results.
Regarding lighting requirements, chives perform best with 6-8 hours of direct sunlight daily. However, they’ll tolerate partial shade conditions, though this may result in slightly less robust growth and milder flavor intensity. In extremely hot climates, some afternoon shade can actually benefit the plants during the height of summer.
Watering and humidity management
Establishing proper watering routines ensures healthy plant development throughout the growing season. Young plants require consistent moisture during their first few weeks, but mature chives are surprisingly drought-tolerant once established in the garden.
Aim for moderate humidity levels around 40-60%, providing good air circulation to prevent fungal issues. Water deeply but infrequently, allowing the top inch of sol to dry between waterings. This approach encourages strong root development while preventing common moisture-related problems.
Propagation methods and seeding techniques
Growing chives from graines offers the most economical approach and provides excellent results for patient gardeners. Start seeds indoors 8-10 weeks before your last expected frost, or sow directly in the garden after soil temperatures consistently reach 15°C.
When starting from seed, scatter them lightly over prepared soil and barely cover with a thin layer of earth. The graines require light for germination, so avoid burying them too deeply. Keep the seeding area consistently moist but not waterlogged during the 2-3 week germination period.
For faster results, consider purchasing established plants from your local nursery. This approach gives you harvestable chives much sooner, though it costs more than growing from graines. Similar to characteristics and care for garlic mustard, understanding different propagation options helps you choose the best method for your situation.
Division and multiplication techniques
Established chive plants benefit from division every 3-4 years, both for plant health and to create new plants for expansion or sharing. The best time for division is early spring, just as new growth begins to emerge from the soil.
Carefully dig up the entire clump and use a sharp knife or spade to separate it into smaller sections, ensuring each division has both roots and shoots. Replant immediately at the same depth as the original plant, spacing new divisions 20-30 cm apart to allow for future growth.
Essential maintenance and care practices
Regular harvesting actually improves plant health and encourages continued production throughout the growing season. Cut leaves to within 2-3 cm of soil level, taking care not to harvest more than one-third of the plant at any single time.
These hardy plants require minimal fertilization, though an annual application of compost or balanced organic fertilizer in early spring supports vigorous growth. Avoid over-fertilizing, as this can lead to excessive leaf growth at the expense of flavor concentration.
During winter months in colder regions, the feuillage will die back completely, but the underground bulbs remain dormant until spring warmth triggers new growth. Just like Japanese pieris care and characteristics, understanding seasonal cycles helps you provide appropriate care year-round.
Common challenges and solutions
While chives are generally pest-free, occasional aphid infestations may occur, particularly on new growth. A strong spray of water usually dislodges these soft-bodied insects, or you can use insecticidal soap for persistent problems.
Prevent fungal issues by ensuring adequate air circulation around plants and avoiding overhead watering late in the day. Remove any yellowing or damaged feuilles promptly to maintain plant health and appearance.
Container growing and indoor cultivation
Pot culture opens up chive growing possibilities for apartment dwellers and those with limited garden space. Choose containers at least 15-20 cm deep with drainage holes, as these plants develop extensive root systems over time.
Indoor cultivation requires a sunny window or supplemental grow lights providing 6-8 hours of bright light daily. Rotate pots regularly to ensure even growth, and maintain consistent soil moisture without allowing waterlogging.
Container-grown plants may require more frequent watering than garden-planted specimens, particularly during warm weather. Monitor soil moisture levels closely and adjust watering frequency accordingly, much like managing propagation and care for Dieffenbachia seguine in indoor environments.
Harvesting and utilizing your chive crop
Fresh chives offer the best flavor when harvested just before use, though they store well in the refrigerator for up to a week when properly handled. Cut leaves with clean scissors or garden shears, preferably in the morning after dew has dried but before the heat of the day.
For longer storage, consider freezing chopped chives in ice cube trays with water or oil, or dry them for use throughout winter months. While dried chives lack the punch of fresh ones, they still provide subtle onion flavor to cooked dishes and soups.
The flowers are also edible and make beautiful garnishes for salads or cheese platters. However, removing flower stalks before they fully develop encourages continued leaf production if your primary goal is harvesting foliage for culinary use.
Allan is a lifelong gardening enthusiast who still gets excited when the first seedlings pop up in spring. With a deep love for nature and a hands-in-the-soil approach, he shares practical tips, plant discoveries, and clever tricks picked up over years of digging, planting, and observing. Whether you’re a new gardener or have a shed full of tools, Allan writes like a neighbor who’s always happy to swap cuttings and stories over the fence.
You can find more about Allan’s work on Malt or connect with him on LinkedIn.