Why are my garden croton leaves turning yellow – care tips and solutions
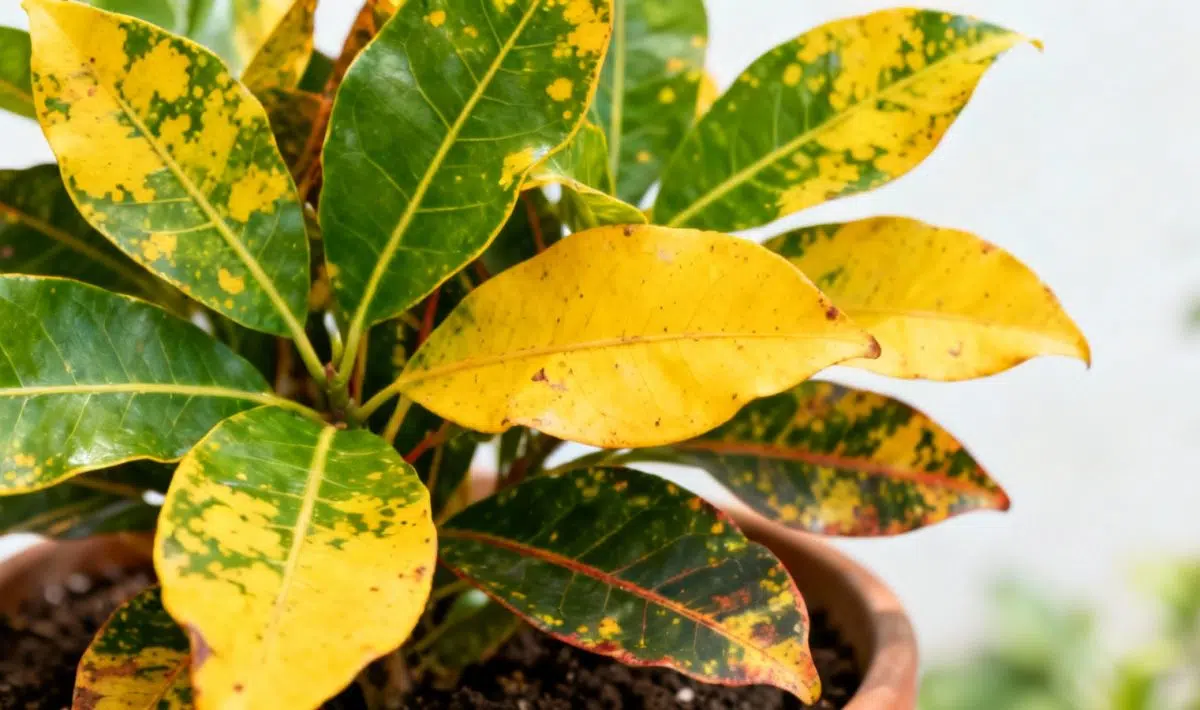
Nothing quite breaks a plant parent’s heart like watching those gorgeous, vibrant croton leaves slowly fade to yellow. Trust me, I’ve been there! Your beautiful Codiaeum variegatum was probably the star of your indoor garden just weeks ago, showing off those stunning multicolored leaves. Now you’re wondering what went wrong and how to bring your tropical beauty back to its former glory.
The good news is that yellowing leaves on crotons are incredibly common, and most of the time, it’s totally fixable. These tropical houseplants can be a bit dramatic when their needs aren’t met, but once you understand what makes them tick, you’ll have a thriving plant again in no time.
Let’s start with the most common culprit behind yellow croton leaves – lighting issues. Your croton absolutely craves bright, indirect light for at least 6 hours daily. Think of it like this: in their native tropical habitat, these plants grow under the canopy of larger trees, getting plenty of filtered sunlight without the harsh direct rays.
When your plant doesn’t get enough light, it starts dropping its older leaves first – and guess what color they turn? Yep, yellow! The plant is basically saying, “I can’t support all these leaves with this little energy coming in.” During autumn and winter months, this becomes even more challenging as natural daylight hours decrease.
✅ Quick Checklist
Is the soil too wet or too dry?
Is the plant getting 6+ hours of sunlight daily?
Have you fertilized in the last 2 months?
Are there visible pests under the leaves?
Does the pot have adequate drainage?
🔥 FREE
📱
Diagnose your plant in one click!
AI instant diagnosis • Personalized solutions • 50,000+ species
If you’re dealing with insufficient light, try moving your croton closer to a bright window or consider supplementing with a grow light. Just avoid placing it in direct afternoon sun, which can actually scorch those beautiful leaves and cause them to fade or brown at the edges.
Getting the watering balance just right
Here’s where things get tricky – crotons are particular about their water situation. Too much water is actually more dangerous than too little, but both extremes will cause yellowing leaves. The key is finding that sweet spot where the soil stays consistently moist but never soggy.
Overwatering is probably the second most common reason for yellow croton leaves. When the roots sit in waterlogged soil, they can’t breathe properly and start to rot. The plant responds by dropping leaves, starting with the older ones that turn yellow first. You might also notice the soil smells funky or the base of the plant feels mushy.
On the flip side, if you let the soil get bone dry, your croton will also start yellowing and dropping leaves as a stress response. These tropical plants prefer consistent moisture – think of a wrung-out sponge rather than a soaking wet or completely dry one.
Creating the perfect soil environment
Let’s talk about soil because it’s closely tied to your watering success. Crotons need well-draining potting mix that holds some moisture but allows excess water to escape quickly. A good quality indoor plant potting mix with perlite or bark mixed in works wonderfully.
The pot you choose matters too! Make sure it has drainage holes – this isn’t negotiable. Without proper drainage, even the best watering routine won’t save your plant from root rot. I like to put a layer of small stones or broken pottery at the bottom of the pot for extra drainage insurance.
Similar yellowing issues can affect other garden plants too. For example, if you’re experiencing cosmos plant leaf discoloration causes, the underlying problems often relate to similar care factors like watering and soil conditions.
Humidity and temperature considerations
Remember, your croton is a tropical plant that’s used to humid environments. Most homes, especially during winter when heating systems are running, have much lower humidity than these plants prefer. Low humidity can cause leaf edges to brown and eventually turn yellow.
You can increase humidity around your plant in several ways:
Place a humidity tray filled with water and pebbles near your plant
Group your houseplants together to create a microclimate
Use a humidifier in the room
Mist the leaves lightly (but not too often, as this can promote fungal issues)
Temperature-wise, crotons prefer consistent warmth between 65-80°F. Cold drafts, sudden temperature changes, or placing your plant too close to heating vents can all trigger yellowing leaves.
✅ Quick Checklist
Is the soil too wet or too dry?
Is the plant getting 6+ hours of sunlight daily?
Have you fertilized in the last 2 months?
Are there visible pests under the leaves?
Does the pot have adequate drainage?
🔥 FREE
📱
Diagnose your plant in one click!
AI instant diagnosis • Personalized solutions • 50,000+ species
Yellow leaves can also indicate that your plant is hungry! During the growing season (spring through early fall), crotons benefit from regular feeding with a balanced liquid fertilizer every 2-4 weeks. Dilute it to half strength – these plants prefer gentle, consistent feeding rather than heavy doses.
However, be careful not to over-fertilize, especially during winter when growth slows down. Too much fertilizer can actually burn the roots and cause yellowing. If you suspect over-fertilization, flush the soil with plain water and hold off on feeding for a few weeks.
Common pests and diseases
Sometimes yellow leaves aren’t about care conditions at all – they might be caused by unwanted visitors. Spider mites, scale insects, and mealybugs all love crotons and can cause yellowing as they feed on the plant’s juices. Check the undersides of leaves regularly for any signs of pests.
If you’re dealing with similar issues in other plants, the diagnostic approach is often comparable. For instance, catmint leaf yellowing solutions often involve checking for pests and environmental stressors, much like with crotons.
Fungal diseases can also cause yellowing, usually starting with small spots that gradually expand. These are often related to overwatering or poor air circulation around the plant.
When to be concerned vs. natural leaf drop
Here’s something that might surprise you – some yellow leaves on crotons are completely normal! Like all plants, crotons naturally shed their older leaves as they grow new ones. This is especially common during seasonal transitions or when the plant is adapting to a new environment.
The key is to distinguish between natural leaf drop (usually just a few older, lower leaves) and stress-related yellowing (multiple leaves turning yellow quickly, or new growth being affected). Natural leaf drop is slow and affects just the oldest leaves, while stress-related yellowing happens faster and can affect leaves throughout the plant.
Recovery and prevention tips
If you’ve identified the cause of your croton’s yellowing leaves, don’t expect overnight results. Plants recover slowly, and it might take several weeks to see new, healthy growth. Remove any completely yellow leaves by cutting them off at the base – they won’t recover and removing them helps the plant focus energy on healthy foliage.
For prevention, establish a consistent care routine: check soil moisture regularly, ensure adequate light, maintain stable temperatures, and keep an eye out for pests. Your croton will reward your attention with that gorgeous, colorful feuillage that made you fall in love with it in the first place.
Remember, every plant goes through ups and downs, and yellowing leaves don’t mean you’re a bad plant parent. With a little detective work and some adjustments to your care routine, your croton will be back to its vibrant self before you know it!
Allan is a lifelong gardening enthusiast who still gets excited when the first seedlings pop up in spring. With a deep love for nature and a hands-in-the-soil approach, he shares practical tips, plant discoveries, and clever tricks picked up over years of digging, planting, and observing. Whether you’re a new gardener or have a shed full of tools, Allan writes like a neighbor who’s always happy to swap cuttings and stories over the fence.
You can find more about Allan’s work on Malt or connect with him on LinkedIn.